Waterfront Project | Part 5
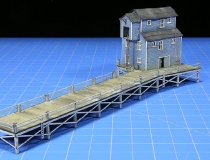
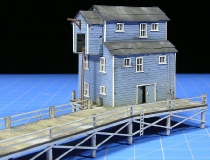
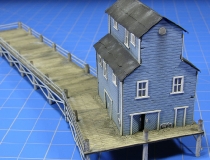
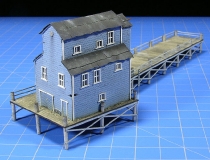
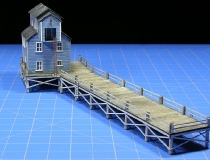
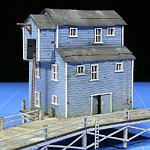 We continue along with the Waterfront Project by presenting the buildings we’ll be using on our Florida themed layout. Here we have our build of the Micro-Trains Line Fish Market Kit (MTL Part 799 90 937). I had thought about doing just a bit of kitbashing with these buildings but decided against this for a couple of reasons. First, these are some very cool models! There’s a lot in interest in these as-is, lots of interesting architecture going on here. The second reason to build these kits as-is was to illustrate just how good these pieces look with no tweaking… just paint and assemble.
I know I run the risk of sounding like an MTL ad, and MTL is sponsoring this Waterfront Project series, but these are some truly exceptional Z scale kits. Clear and concise instructions, terrific laser cuts in the wood frets… often just a pair of light cuts with the X-Acto knife is all that was needed to free a piece from its fret, this is a feature that makes kit building in Z scale a lot easier. With lots of small pieces involved you don’t want to be heavy handed during construction. There’s also good use of the 3M brand adhesive backed wood sheets for details like windows and door frames.
For ease of painting MTL suggests painting the wall sheet one color and the window trim sheet a contrasting color. I did this with the exception of the wood ladder and the electrical meter… I wanted just a small color accent in there.
For this project I used a Paasche H airbrush. This is a single action airbrush and about as simple as it gets! If you’ve only been using a paintbrush or aerosol spray paint, I’d suggest having a look at this model. I used the inexpensive (under $1 per bottle) acrylic craft paints, the kind you can find in craft stores like Michael’s. To prepare the paint so it would flow smoothly through the airbrush I thinned it down with generic blue windshield wiper fluid… roughly a 1 to 1 mix making the paint the consistency of skim milk. I like these thin coats of paint as they allow the wood texture to show through, they dry very quickly and they minimize the effect of the wood warping when painted.
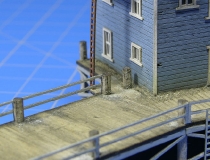
For the dock I wanted a basic weathered wood look so I gave it single coat of natural wood stain. Once dry I mixed some dark gray weathering powder with alcohol and added some streaking to the surface to simulate water damage. I can go in later and distress this more if I like but I wanted to begin with a less-is-more approach. It’s always easier to add then to remove weathering!
A little bit of a light-colored ground soil was added around the base where the building meets the dock. I just wanted to add a little subtle grit to the scene with this. Really the thing that took the most time, as it usually does with Z scale kits, was layering the included clear acetate to the window mullions, placing them into the window openings then laying on the outer window frame. If you’re like me and you’re windows aren’t all perfectly aligned… welcome to the world of rustic buildings!
One thing I should have mentioned at the start of this article and that is, I’m not the most proficient kit builder out there by a long stretch. A little sag in some of my roof lines, maybe the unintended gap here or there and the always possible out of true walls. If there’s ever an ultra modern skyscraper in Z scale I don’t think I’ll build it. I like character in my buildings and this dovetails beautifully with my kit building skill set.
Short of gluing windows to doors or adding a dock to a roof top… I don’t think kits need to be perfect when built. I think more important is the care and effort that goes into a piece, the spirit of the builder. Call me a sentimental sap but I really believe this.
Of course on the other hand the more kits you build the more proficient you’ll become, nobody is an accomplished kit builder on their first (or second!) try. Knowing what tricks early on in a kit build that will save you time later, developing a better sense of complimentary and contrasting colors and even honing your motor skills when working in a small scale will improve with repetition. Whether your a novice or an old hand at kits, while you’re building please remember to enjoy the process!
Once I’m ready to add this to my scene I’ll go in and touch up the small details… there are always small details in Z! This was a great first build for the Waterfront Project and I’m now looking at making some real progress on my buildings.
Category: Z Scale Basics


