Waterfront Project | Part 6
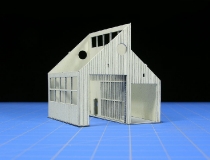
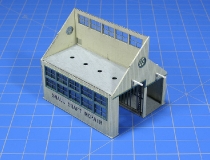
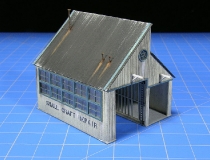
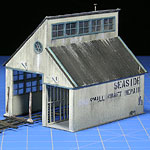 In the last Waterfront Project article we built the Micro-Trains Line Fish Market Kit, for the most part we added just a little bit of age and weathering to that kit so let’s ramp it up just a bit this time out with the Boat Repair Shop Kit (MTL Part 799 90 939). I wanted to weather this kit a bit more to give the feel of a slightly grimy place of business. For a building that has some very cool angles to it, this is a surprisingly simple kit to build. As with the previous kit I went with two basic colors, antique white for the walls and teal for the windows and trim. Since this is a Florida-based layout… teal seemed a good choice. I used a few accent colors like dove gray for the floors and doors.
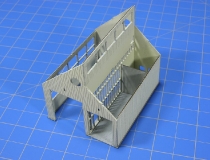
With crisp laser cuts and lots of tab-and-slot construction the build went quickly. I purposely smudged up the windows on this kit with a bit of gray weathering powder; I figured guys working in a waterside boat repair shop wouldn’t be reaching for the Windex when they had a free minute or two.
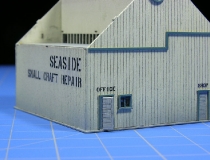
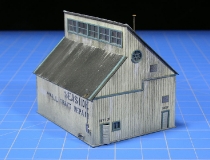
This kit came with a sheet of waterslide decals with a no-nonsense stencil typeface, perfect for a utilitarian bunch of signs. I’m not too experienced with decal application and these decals are great for the new or the experienced user. The kit directions suggest cutting the decals as close to the letters as possible and then set them on a soppy wet paper towel until wet enough to slide off. I’m used to placing decals right in a small container of water but this paper towel method worked very well.
The decals are surprisingly strong as once they were on the building I was shifting them around a bit until I got them into position. I was worried about the decals bunching up of tearing but they held up well for me. After the decals were fully dry I applied a couple of coats of Testors Dullcote, a flat lacquer finish.
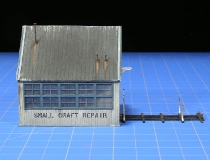
I did have one problem with the decals but this was my fault, not the decal. The decal that reads Seaside, Small Craft Repair… I wanted to add a white paint rectangle right before the word Small. Since I have a couple of coats of the Dullcote on already I thought I’d mask off this rectangle with thin strips of blue painters tape and paint the rectangle. As I removed the tape the bottom of some of the letters came off with it! Initially really annoyed at myself, I figured I’d add some weathering streaks and smudges where these letters bits came off. I may go back and touch it up some more but in some ways this was a happy accident. It kind of has a look to it, the lettering on an old building not perfect.
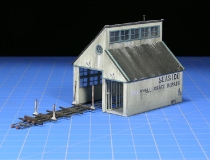
This kit also has a winch track and boat cradle. The winch track is cut from a thin material and this will allow it to match the contour of the land on the layout. Nice touch. There are even small round wheels for this cradle and track… really small! Still, once painted red they are visible and they really do add a nice touch.
Pins are included to represent a smoke stack and vents. A quick shot of silver paint and weathering powders give these a rusty look. Originally I had these pins meeting the walls, nice and cleanly but I figured on a building like this, they’d have been repaired more than once where they leaked! Just a pin point of glue mixed with weathering powder gave me the look I wanted where the pins meet the roof.
A bit of dry brushed white paint gave my roofs some age… or visits from seagulls! A little sandpaper on the teal trim and on random spots on the walls finished the look. I’ll may darken the inside walls once I place this piece on the layout but I’ll wait on that until this piece gets placed. There’s an extra ladder and window included in this kit, great little accessories to lie against you building once it’s in place. In Z scale… you can’t have too much cool clutter.
Category: Z Scale Basics


