


Using Solder Paste
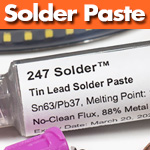 I’ve been using more loose, small LEDs lately in various projects recently and soldering them can be a bit of a trick. While it is possible to use regular solder from a spool, I thought I’d give solder paste a try. Solder paste is a thick, sticky material made up of small (very small!) solder balls suspended in flux. If you look closely under magnification, the solder balls almost look like microscopic fish eggs.
In the example shown here, I’m using 0805 LEDs with solder pads. The 0805 LEDs measure 2.0mm x 1.25mm x 0.8mm. In these photos we’re using 28AWG twisted solid wire. This is small wire, but next to these small LEDs, it almost looks beefy!


A good technique for soldering these LEDs is the use of double-sided tape on a ceramic tile. This is ideal to hold the wires, as well as the LEDs, in place while working. The tile can act as something of a heat sink, though your soldering iron will only need to touch the solder paste for a fraction of a second in order to melt it. It’s actually pretty simple to do this soldering, the only real trick is to get used to working small and keep your hands steady.
Here I used a toothpick to apply the paste to the ends of the wires but you can just as easily put a small amount of paste on the tile, and then run the wire ends through the paste. I’ve used a little more paste in these photos than necessary to better show off this paste.
Depending on the thickness of wire you might use, the double row of tape that I have here holding the wire may not be necessary in your case. This is actually pretty thick wire for these LEDs, and the double row of tape is useful for holding the wires. If you’re using magnet wire, this extra tape to hold the wire may not be necessary. It’s really about personal preference and what works best for you.
From here you just want to determine the anode (+) and cathode (-) of the LED. On these LEDs, a green arrow points to the cathode, this is where my black wire will go. Next, you line up the wire ends on top of the solder pads and with a fine tipped soldering tip, just touch the wire for a fraction of a second, that’s all the heat needed to melt the solder.


Even though this is an incredibly small amount of solder, the hold it provides is surprisingly strong. In the last photos here, I actually have a bit of unmelted solder next to one of the solder pads. You can usually just wipe this off with your finger or something like a small toothbrush. For being so small, these LEDs can actually be pretty forgiving when soldering!
Of course you’ll still need to use a resistor with any LEDs or all of your work will likely result in either a small “poof” or a very brief flash of light when hooked up to your power source. Exciting, but not really what you want. So if you’re looking for something to play with on a Sunday afternoon, you can always try a little solder paste and some loose LEDs!
Category: Useful Tools


