Waterfront Project | Part 7
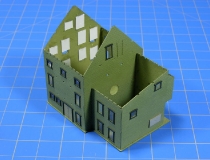
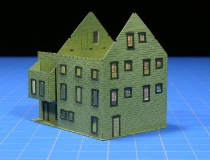
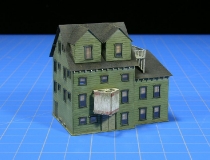
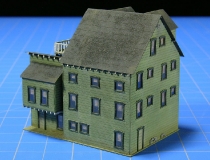
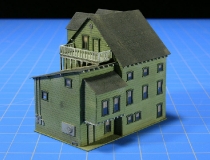
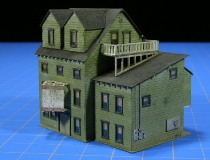
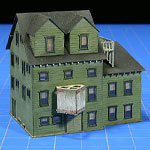 Our next Micro-Trains kit build is the Hotel Kit which has some great features including a second story outdoor deck, a pair of roof dormers and lots of windows, 40 windows in total! There are only 39 windows on our version of this kit but we’ll get to that in a minute.
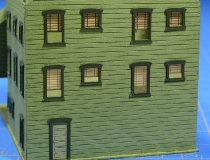
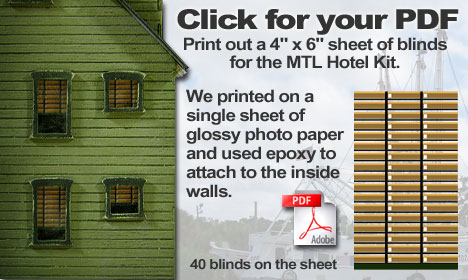
For a building with lots of interesting little angles, this kit was pretty straight ahead to build. There was one addition I added to this building, window blinds. After I began assembly I knew I wanted to jazz up the windows just a bit so I looked at some window dressing alternatives such as tissue paper for curtains or shades. I then considered making a small jig and building blinds for each window with strip styrene but with 40 windows involved, I wanted something a little simpler.
I downloaded several photos of real blinds and drapes from the web but wasn’t happy with the way they looked in print once reduced to Z scale window size. I then decided to create my own wooden blinds in Adobe Illustrator.
I played with several versions of these blinds using drawn lines of slightly different thicknesses and color, finally came up with a look I liked; a blind that I felt fit the building style and period. Also in the blind drawing are the vertical strings or cord used to raise and lower the blinds.
I printed these blinds on a piece of 4” x 6” glossy photo paper for maximum color saturation, regular printer paper or even a heavy matte finish card allowed the ink to bleed a bit too much. We used an epoxy to attach the cut blinds to the inside of the building. Just a drop at the top of the window opening on the inside of the walls was enough. I tried conventional glue as well as CA but the glossy paper doesn’t take glue well. I didn’t want any of these blinds coming loose after I had my roof section glued in place, so the epoxy won out.
Really the longest step in this build was adjusting (and readjusting, and readjusting) the blind position in place. I wanted to get the vertical blind cords centered for each window and we’re dealing with small tolerances here for centered blinds. The epoxy has a several minute set time so adjustments were very possible if a little maddening!
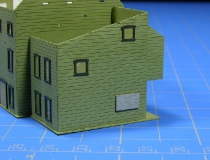
I mentioned earlier that this kit has 40 windows in total but out build has 39, it’s a simple explanation. As I was adjusting one of the window frames with the tip of an X-Acto knife, the frame popped loose and launched itself… somewhere. I did a cursory search on the bench top but realized almost immediately the frame was a lost cause. Not having an extra window frame I took a thin piece of scrap wood from a previous kit, gave it a shot of light gray paint and cut it to the scale size of a 4’ x 8’ sheet of plywood. I covered my window opening and placed one of the round vents that came with the Hotel Kit on top of my plywood sheet. In my hotel… this window was removed when a makeshift kitchen was installed and the fan vent backs this up!
A happy accident as I really like the plywood sheet, give things a lived-in look. To keep to my look of a lived in building, and to stay consistent with the other Waterfront Project buildings I lightly sanded and weathered my hotel. Using a folded piece of 400 grit sandpaper placed in a pair of tweezers, I lightly sanded my window frames and random areas on the exterior walls. I’ll likely do more weathering once the kits get put in to place on the layout.
The last alteration I made to the kit was the large sign above the front doors. This kit came with a paper sign but in keeping with my older building look, I felt it was too contemporary. I sprayed the backing pieces of wood white with a red border, top and bottom. Once dry I very lightly sanded with my 400 grit paper. Just a couple of light passes gave me a nice, aged look. To my eye the sign, now empty in the center of any text or graphics, has an older run down look to it like a sign was there at some point but either blew away in a storm (this is the Waterfront Project!) or was simply removed years ago. In either case it gives it a sense of history… something was there!
Overall I’m very happy with this kit and it has a really good feel next to the other Waterfront Project kits.
On the PDF: My suggestion would be to use a 4” x 6” sheet of glossy photo paper. Set your printer to print on glossy paper and at high resolution. Allow to dry then cut your blinds free. I’d suggest only placing a few blinds at a time so you’ll have ample working time to make any positioning adjustments. I used the tip of my X-Acto to adjust position from the top of the building, making small adjustments and then checking on the blind position from the front. It takes a while to complete 40 windows (or 39!) but I think it’s worth the effort.
Category: Z Scale Basics


