Waterfront Project | Part 11
 Mistakes are good. Well, not exactly “put on the music and dance ‘till dawn” good, but they can be very useful if you approach them with an open mind. In Part 8 of this series I built the Micro-Trains Line Pier Warehouse Kit. I really like this kit for its interesting angles and banks of windows.
On that build, unfortunately I made a poor choice of color for the window frames and ended up scrapping that finished piece. I went with a muddy brown color and the widows ended up looking like injection molded add -ons. To my eye, the window frames seriously detracted from the look of the kit and in particular, those beautiful banks of windows.
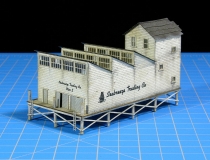
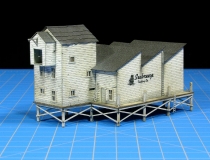
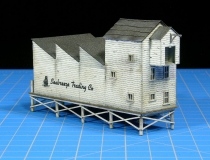
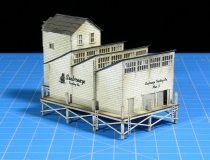
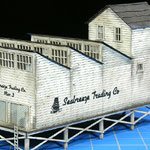
Here we are then with a fresh rebuild of the MTL Pier Warehouse. This time out I kept the window frames the same color as the building, off white. I also changed the colors on the doors to a light gray for a more subtle look. This is a well-worn commercial building after all, a utilitarian paint scheme made sense to me.
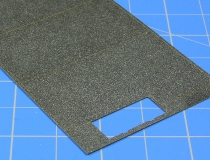
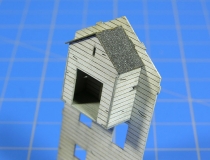
There are two main differences between this build and the previous version. For the roof sections on this build, I airbrushed a gray spatter finish on the black roof sections to simulate roof texture. In the first kit, I actually applied a fine black ballast powder to the roof and while it looked good, I went with the spatter finish this time for a bit of variety.
The next difference was the window frames on the three large banks of windows, on this build I left the top frames off altogether. I was tempted to leave the frames off all the windows on this kit but decided just to leave them off the large window banks. Since this is a hard-working commercial building, I thought the fewer frills the better, give it more of plain look. Also by leaving off these outer frames, the windows have a finer and slightly more intricate appearance in my view.
A related note on basic appearances with Z scale kits, edges. Specifically where wall edges meet and create a seam. This is always a tough choice in kit building… do you cover the edges with some sort of corner molding or leave them visible? You can touch up the edges after the walls are assembled but often the brush strokes are very visible. What I tend to do is to airbrush the edges as I’m painting the walls early in the construction phase.
Edge cuts in wood are tricky though as they absorb paint like a sponge. You can lay the paint on very heavy but that can leave you with less than crisp edges. What I often do is to paint the edges, build the kit and then apply weathering powders to these edges… not trying to hide these edges (which is near impossible) but instead accentuate them, make these edges a feature of the model. Make them appear to be an artistic or architectural choice, not an obstacle.
As on the first version of this kit, I whitewashed several of the windowpanes to add to the appearance of age. A little more weathering powder, a few shots here and there from the airbrush and the Pier Warehouse kit is done… again!
I’m glad I rebuilt this kit, this time it more closely matches what I was going for. Sure, my mistake burned a bit of additional time and was initially a bit frustrating, but there’s an old quote I like, “It’s easy to stop making mistakes. Just stop having ideas.”
Category: Z Scale Basics


