A Rock Outcrop Made With Water Putty
 I came across some photos recently on TrainBoard in the HO section and enjoyed these images so much I contacted the model builder, Michael Cawdrey of Brisbane, Australia, and asked if he’d write an article for us here at Ztrains.
I was really taken with Michael’s groundwork but what I didn’t know at the time is that Michael is a professional artist. You can see some of his work here. Maybe in the future we can have Michael put together a background primer for us!
Thank you for sharing your techniques with our readers Michael!
When John kindly approached me to submit an item to Ztrains.com, I was unsure how useful the efforts of an HO modeller might be, yet he assured me that rock work would translate well across all scales, and I was thus encouraged to prepare this step-by-step article.
I hope someone finds it helpful.
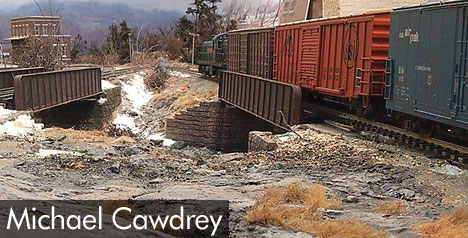
Michael Cawdrey
Gallery 1


Gallery 1 | Top Left
First up, the target area, open and boring, and, being close to the river while sandwiched between two lines [the closer one now terminated at the far end] an unlikely place for an access road and buildings.
Gallery 1 | Top Right
I decided I’d like a low rock cutting somewhere visible. That meant it needed to be alongside the closer of the lines, and if I were to shape the rock to gradually slope away as it went farther back into the layout, it would also mean I wouldn’t have to continue it off into the distance, which would have created some major complications with the existing scenery and track.
To help add bulk and height to the outcrop I placed some white foam alongside the front spur, and I smothered it with loads of water putty. To help with adhesion it’s best to pre-wet the area.
Gallery 1 | Center Left
After it’s spread around with spatulas and bits of card, the putty has a somewhat swirled appearance which is smooth and not particularly rock-like, so, while it dried, I paid a lot of attention to its surface, scraping and shaping it with an old craft-knife blade. I had approximately half an hour before the surface hardened, although the putty needs several days before it’s fully set, after which it can still be scraped if need be.
Gallery 1 | Center Right
I used a chisel to scrape down the edge alongside the old spur to indicate cut rock rather than leaving just some sort of vague edge. That caused some minor damage which I had to repair with more putty.
Gallery 1 | Bottom
A close look at the surface texture after much work with the blade, gouging cracks and modifying the surface. I wanted an outcrop that had lain bare for centuries. I didn’t bother with any strata. I like to think of it as granite or something along those lines, perhaps it’s metamorphic.
A smooth surface can be achieved by working with a wet blade, while rougher, more crumbly textures result if the blade is kept dry.
Gallery 2


I liberally sprinkled these mixtures onto the edges and into some of the hollows in the rock outcrop to help marry it to the surrounding landscape. I glued it all down with dilute white glue. Then – at last – I got the paints out.
Gallery 3


In some of the deeper hollows I pre-wet the rock and dribbled on some near-black. In other places I didn’t bother too much, because I could always add more dark later if need be. I just like to vary the process without it becoming a formula.
I mixed up some greys with off-white, black, burnt sienna, blue and raw sienna. Just loose mixes, making up small batches at a time which helps me to vary the colour as I go. With the water putty you have to use plenty of opaque paint such as white if you wish to block out the yellowness, although the hint of yellow here and there is nice too. Darker tones in the recesses were left undisturbed.
I also used powdered pastels, rubbed on with my finger, to help pick out the raised parts of the rock which serves to emphasise the darker hollows.
Gallery 4


In the first two photos you can see the difference the pastels make. I used a pale grey, raw sienna and a little burnt sienna. The chalk is also very helpful in reducing any unnatural surface sheen.
The finished rock outcrop after the spur was ballasted. Pastels were also useful on the vertical rock face alongside the spur, where I was mindful of the need, more often than not, to apply colours with vertical strokes.
Grasses are tufts of fine-fibre cleaning cloth, painted to suit the wintry landscape. Taller plants are strands of sisal rope fibre, similarly painted. Snow is Woodland Scenices Flake.
Category: Raildig Guest