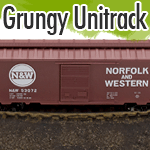
Getting Kato Unitrack Grungy
 It’s time now to get our sectional track attached, weathered and ballasted on our layout base. On a layout this small I find just a single pair of feeder wires is sufficient to provide even power across the whole layout. I could use Kato’s own Terminal UniJoiner for the job but I really do prefer to have my feeders soldered directly to the rails whenever possible. I’ve cut away a small amount of the plastic roadbed from the underside of a section of track for easy rail access and then soldered my feeders. Once the solder has cooled and the flux cleaned away, I apply a layer of 2-part epoxy over the solder joints and wires for a little extra rigidity.

Next, it’s time to permanently attach our track to the foam. I use the same Loctite brand PL Premium adhesive as I did for laminating the layout’s two foam layers together, this Loctite holds nicely to the plastic roadbed and again, it won’t eat through the foam. If you use this Loctite adhesive, or another caulk / adhesive for this job, keep in mind you only need a very thin coat for good adhesion between foam and track. After I apply a bead of adhesive, I go around with an inexpensive putty knife to even out the adhesive and to get it uniformly thin. Once the adhesive is spread thin, it’s just a matter of placing the track where you want it and importantly, adding some evenly distributed weight on top of the rails and allow to dry overnight.


One thing I have found interesting about the Kato Compact Unitrack, even when it’s connected properly there seems to be just a bit of unevenness at the top of the connecting rail sections, also the rail joiners don’t sit perfectly horizontal when track sections are connected. I found this on all connecting sections. Not really an issue as a couple of swipes with a file followed by some sanding with 800 or 1000 grit sandpaper brings the rail tops flush. As this is a small layout and the trains will be operating at a creeping speed, I wanted to make sure the loco’s wheels have no impediments.

Once our track is powered and attached to the base, the next step is to give the nice clean Unitrack a really old and grimy look. I often use dry weathering powders on my track and like painting on a clean white canvas, I like and build up my track colors on a white base. I use Zinsser® Bulls Eye 1-2-3® primer spray instead of generic white spray primer as the Zinsser® tends to cover and grip better on the shiny Unitrack plastic. Don’t overdo the primer because too much can hide the detail of the track ties and generally make things appear too thick.
As this small layout will feature a switcher, I wanted to give this track a very old and oily look, not at all the look of a clean mainline railroad. I’ve used a light brown powder as the base color with black powder on top in random areas. Once the powder is applied, I gave the track a shot of Testors Spray Dullcote as a sealer so my powders stay in place once I apply the ballast adhesive.


Applying the ballast is our final step here today. Actually, it’s not so much ballast as it is various soils and gravel dust I collect and grind myself. For these yard looks, I actually prefer this mix to real ballast as it emphasizes the whole grungy and oil-soaked look. This soil mix is applied just like conventional ballast using a wetting agent and a thinned white PVA mix. I actually use the ready prepared Matte Medium liquid from Scenic Express but this is just a personal preference. Once my “ballast” is soaked with the Matte Medium, it’s an overnight dry to make it solid as a rock.
The track now is at the stage where I can begin my layout scenery work. I’ll be touching up the ballast colors once the scenery is in place, adding darker colors to simulate oil-soaked soil, adding more texture where needed, etc. We now have good basic appearance for the track that will blend in nicely as we continue our pizza build.
Addendum
After publishing this article, I received a couple of emails asking why I didn’t just paint the Kato Unitrack to simulate the oil-soaked yard look. I have to admit I really love the look of the old oil-caked ground around my track and I find the best way to achieve this is through the application of various fine-ground materials. It just has the look of history to it, how many trains had to use these tracks to look get this look? There’s always the risk of overdoing it of course, that’s why I like to refer back to photos of actual places and tracks.
Article Links
Zinsser® Bulls Eye 1-2-3® Primer
https://www.rustoleum.com/product-catalog/consumer-brands/zinsser/primer-sealers/bulls-eye-1-2-3-spray/Testors Spray Dullcote
http://www.testors.com/product-catalog/testors-brands/testors/lacquer-paint/top-coats-and-thinners/Matte Medium
http://www.sceneryexpress.com/Matte-Medium/products/1159/
Category: Raildig Build Projects